09 10

Thursday, 28 August 2014

Breading Meat & Fish


I tried unsuccessfully for several years to properly bread meat and fish, and even sometimes veggies.  I finally tried the method below and it works for me every time.

The problem a lot of people have with breading meat and fish is that the home-made breading doesn't stick to the food once you start cooking it.

You can play with the spices listed below.  If you want plain breading, leave out the spices and cheese.  If you want an Italian style breading, add the spices.  You can play with whatever spices you like.

I always use crackers instead of bread crumbs mostly because I literally don't keep bread in my house, and if I do have bread in my house it's too fresh to use as bread crumbs.  Crackers will keep a long time in the cupboard, and make a lovely bread crumbs.

For additional crispiness and a bit of a different taste you can add panko crumbs to the mixture below.

This recipe is good for chicken, veal, fish, pork chops, eggplant, etc.  

There are so many people who are avoiding gluten these days, so if you are one of those people, this would work just fine with gluten free crackers.  Just make sure they are finely crushed. 


Breading Meat & Fish

Recipe by Fluudbloggler
Ingredients
  • 20 Saltine crackers
  • 2 eggs
  • 1/4 cup white flour
  • 1/4 tsp salt
  • 1/8 tsp pepper
  • 1/4 tsp garlic powder (optional)
  • pinch of basil, oregano, parsley (optional)
  • 3 tbsp grated parmesan cheese (optional)
Directions
  1. Place all ingredients in a large ziploc type bag and close tightly.
  2. Crush first with your hands, then take a rolling pin or large bottle and roll over the bag until all the crackers are finely crushed.
  3. In a pan put egg white and quickly beat.
  4. In another pan or dish spread flour through the bottom of the pan.
  5. Whatever meat or fish you are breading, first dry with a paper towel.
  6. Dip the meat/fish in the flour and coated completely.


  7. Shake off excess, then dip meat/fish in the egg mixture until coated completely.
  8. Put meat/fish in the cracker bag mix and shake until well coated.
  9. Heat about 2 tbsp olive oil in the bottom of a pan, and once the oil is hot, place the meat/fish in the hot oil, making sure it sizzles.  If it doesn't sizzles when you add it, your oil is not hot enough.  Cook until you see the sides of the meat starting to crisp up, turn over.  and repeat on the other side.
  10. DO NOT put the meat/fish back in the oven on a rack because that's when your breading starts to flake off, and get mushy. You can however, bake the meat/fish in the oven from the beginning instead of cooking in oil.  Give the meat an extra 10 - 15 longer cooking time than normal in this case.

Tuesday, 26 August 2014

Blueberry Crumble


Fresh blueberries are everywhere right now, and they are so very good for you. When you add butter and sugar, maybe not so much, but it's also very tasty.

I call this a blueberry crumble when it's actually just an adaptation of apple crisp.  So apples, or peaches or even pears can be substituted for the blueberries.  This is amazing served warm with some vanilla ice cream or fresh (real) whipped cream.  It would also be very good with a hot caramel sauce.

(Sorry I forgot to take a photo the finished product, but trust me, it's amazing looking.)

Blueberry Crumble

Recipe by Fluudbloggler
Ingredients
  • 2 cups fresh blueberries
  • 4 tbsp white sugar
  • 2 tbsp water
  • 2 tbsp white flour
  • 1/3 cup brown sugar
  • 4 tbsp butter
  • 1 tsp cinnamon 
  • 1/2 cup additional white flour
  • 3/4 cup rolled oats
Cooking Directions
  1. In a bowl mixed the blueberries, 4 tbsp sugar and 2 tbsp water, and 2 tbsp flour. Stir well, but gently, until all blueberries are coated, then pour into 8" baking dish.

  1. CRUMBLE TOPPING:
  2. In another bowl combine remaining ingredients with a fork until crumbly.

  3. Sprinkle over blueberry mixture.
  4. Bake in a 375 degree oven for 35 minutes.


Saturday, 16 August 2014

Peach Pie Passion

Ontario peaches are now available to buy in stores, however, it's still a bit early and some of them are a little hard.  What do you do with not quite ripe peaches?  Cook 'em up into a lovely peach pie of course.

If your peaches are fully ripe, reduce the sugar by half, and reduce the water by half.  The juiciness and sweetness of fully ripe peaches will still create a lovely sweet pie.

With the pie made here, I made a lattice crust for the top.  I usually make peach pie open face, and so this step is optional as creating a lattice crust is a little tricky and takes practice.  Serve with whipped cream or vanilla ice cream.


Peach Pie

Recipe by Fluudbloggler
Ingredients
  • 8 peaches (not quite ripe)
  • 1 tbsp white sugar
  • 2 tbsp brown sugar
  • 1 tsp cinnamon
  • 2 tbsp white flour
  • 4 tbsp water
  • 1 uncooked pie crust*
  • 1 additional uncooked pie cruse for lattice top (optional)
Cooking Directions
  1. Place single pie crust in pie place.
  2. Peel and slice 8 peaches and place in a bowl.
  3. Add sugars, cinnamon and water, and stir until well mixed and all peaches are coated.


  4. Pour into pie crust. Using 8 peaches, the peaches should be piled quite high as they will shrink down while baking.
  5. If making a lattice crust top, slice strips for lattice and weave onto top of pie.

*For instructions on making pie crust, see my Lemon Meringue Pie post.

Friday, 15 August 2014

Matcha Mango Mania

After walking my 12 k this morning, I really needed an energy booster and pick me up.  Plus I was starving after burning 1000 calories.  Matcha green tea powder is packed with anti-oxidants and is really great for boosting energy, and fat burning.  So I decided to add that to my regular mango smoothie.  It ends up being a pretty ugly looking thing, but really yummy.


1 cup frozen mango
1/2 cup water
3 oz peach or vanilla or plain non fat yogurt
1/2 tsp Matcha green tea powder
1 tsp blue agave syrup (optional)
3 or 4 ice cubs

Blend until smooth in a blender.


Wednesday, 13 August 2014

Alfredo Scalloped Potatoes

Oh yes I did.

I love Alfredo sauce, and I love scalloped potatoes, and when I realized that the thing that makes scalloped potatoes so yummy is the flour, milk, and butter that goes in them, I thought I'd just add a few more things to make them extra yummy.  So I created an Alfredo type sauce for them.

I was pleased with the results of my experience and it's very tasty, but a little on the fatty side.  I never claimed my recipes were going to be low fat.

Recipe by Fluudbloggler


Alfredo Scalloped Potatoes

3 or 4 white potatoes
2 tbsp butter + extra for lining the baking pan
2 cups milk or half and half cream
1/3 cup white flour
2 tsp garlic powder
1 tsp instant chicken stock powder (or veggie stock if you prefer)
1/2 cup Parmesan cheese
2 tbsp more Parmesan cheese
Salt & pepper to taste

Pre-heat oven to 400 degrees, and butter the bottom and sides of a baking dish.

In a medium sauce pan add butter, cream and flour.  Whisk well to remove any lumps. Add the garlic and stock powder.  Heat until boiling and thickened.  Remove from heat and add the 1/2 cup Parmesan cheese and stir until melted. 


Thinly slice potatoes.  I use a mandolin, but if you are good at slicing thinly yourselves with a knife, just use the knife.  

Layer potatoes on bottom of baking dish. After first layer, sprinkle with salt and pepper.  


Add a second layer of potatoes and sprinkle again with salt and pepper.  All to your own taste.  Pour half of Alfredo sauce over potatoes to completely cover.  Repeat layering technique and add remaining sauce.  Just for fun and for looks I added the 2 tbsp Parm. at the end.


Bake in 400 deg oven for 60 minutes.  

Note:  If your potatoes are sliced really thin, then reduce cooking time to 50 minutes, if potatoes are thick, you will have to cook longer to maybe 70 minutes. 

Sunday, 10 August 2014

Burger Challenge


Getting tired of the same old BBQ'd burgers?  We were too, so my friends and I decided to hold a "burger throwdown" competition to try some new ideas.

THE RULES:

1) Create a meat burger with at least 3 ingredients combined.
2) Devise toppings to complement the meat.
3) Chose a bun 
4) Make at least 2, one for the appearance judging, and one that can be divided and devoured by the judging panel.

We had a four person judging panel, and there were four competitors.  The judges consisted of a former butcher, a restaurant manager, a friend's boyfriend, whose qualifications were that he was a young male in his early twenties, who likes to eat, and the Fluudbloggler.  

The competition was stiff, and there was a lot of pre-challenge trash talk, but it was a lot of fun.  They were judged on appearance, meat patty taste, choice of bun, and overall taste. I've posted the ingredients to all four burgers below.  They were all delicious, but in the end burger number 2, the bacon wrapped, cheese stuffed burger was the winner and was awarded our beautiful trophy (sculpted and created by me).  So next time you want to amp up your burger game, try one of our delicious creations below, or just get inspired by them, and create your own. 


Burger #1 - Created by Laura & Jason

Meat patty 
Ground beef
Chopped garlic
Dijon mustard
Guiness
Worcestershire Sauce
Olive oil
Salt & pepper
Newfoundland savoury

Toppings 
Baldersons aged white cheddar
Peameal bacon
Regular bacon
Spicy Mayo - Franks red hot sauce, chopped garlic, horseradish, Nfld savoury
Romaine Lettuce
Tomato
Red onion

Bun 
Ace bakery burger bun


Burger #2 - Created by Christine & Steve - THE WINNER!

Meat patty 
Blend of ground sirloin and pork
Fresh basil finely chopped
Dried oregano, garlic, salt & pepper
1 egg
Hickory & Maple BBQ sauce
Parm cheese
Stuffed with Tex Mex Cheese and wrapped in bacon

Toppings 
Boston lettuce
Beef steak tomato

Bun 
Brioche Bun


Burger #3 - Created by Jo

Meat patty 
Ground beef
Salt & Pepper
Cilantro
Egg
Smoked paprika

Toppings 
Arugula
Bacon
Red Onion
Chipotle Mayo

Bun 
Country Rustic Bun


Burger #4 - Created by Dingo

Meat patty 
1 fresh twig of rosemary
5 sun dried tomatoes finely chopped
garlic
1 egg
1/4 cup dry bread crumbs
1/8 cup feta

Toppings 
Spinach
Feta
Red Onion
Tzatziki

Bun 
Pretzel bun


Saturday, 9 August 2014

Freezing Corn on the Cob


Nothing says summer like fresh corn on the cob.  And right now is the perfect time for buying.  And the more you buy, the cheaper it is.  However, there are only 2 of us living in our house right now, and there's only so much fresh corn two people can eat at once.

I started investigating how I could freeze some of the corn, to enjoy later, without having to go through all the work of blanching it etc.  I found these instructions below.


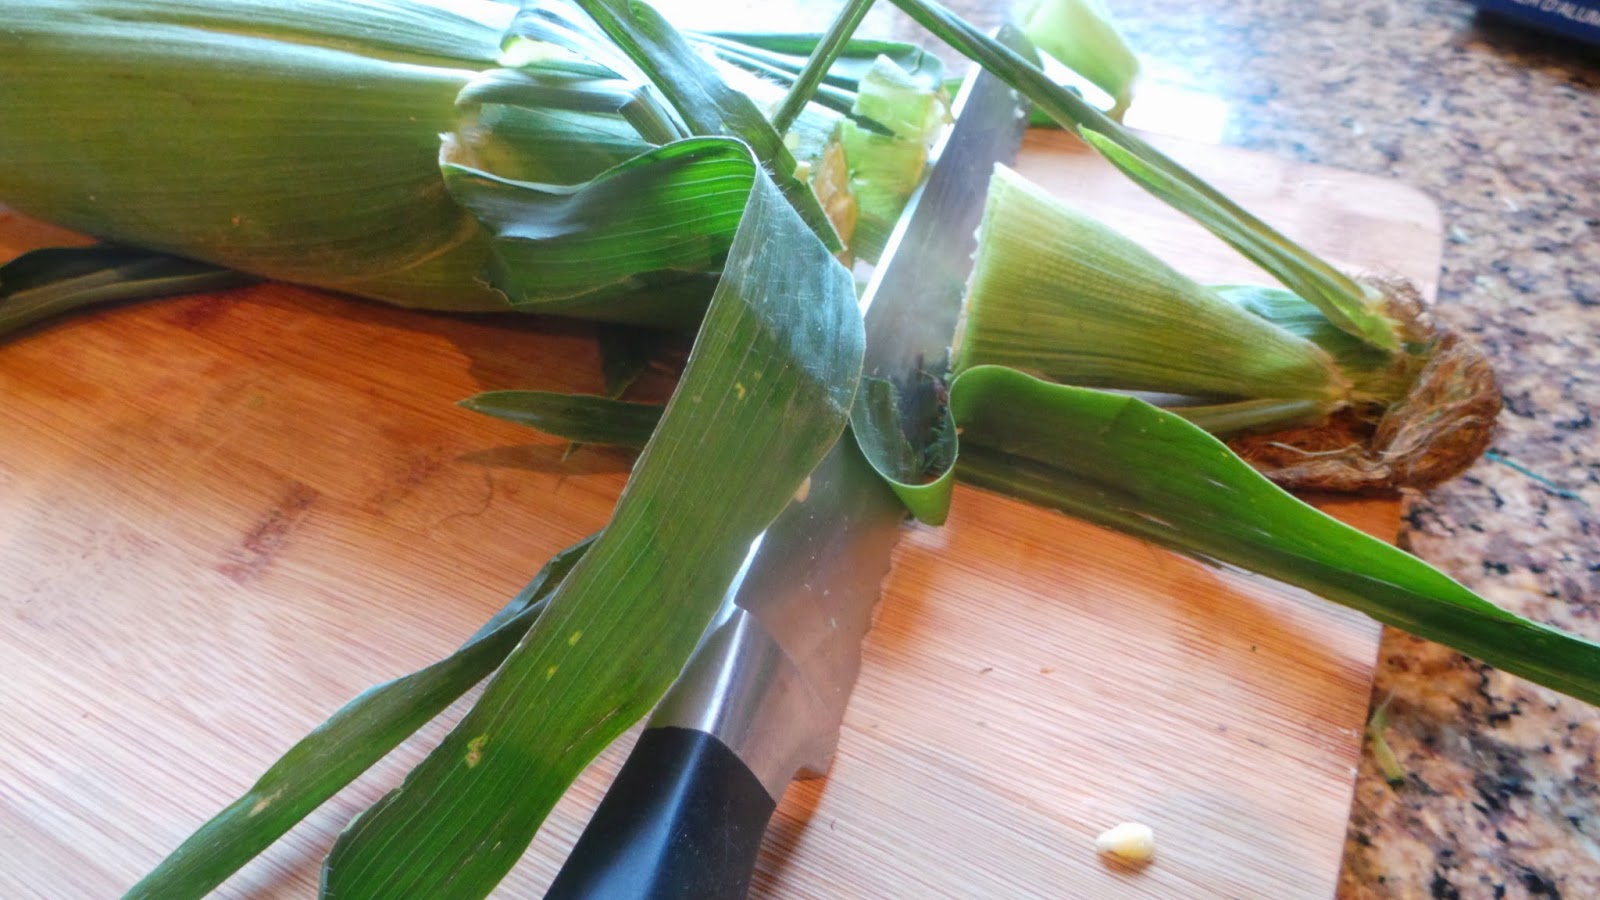
Start with a fresh ear of corn, stalk, leaves, silks and all.

Cut off both ends with a sharp knife making sure you don't cut into the actual kernel area.


Remove any lose leaves.

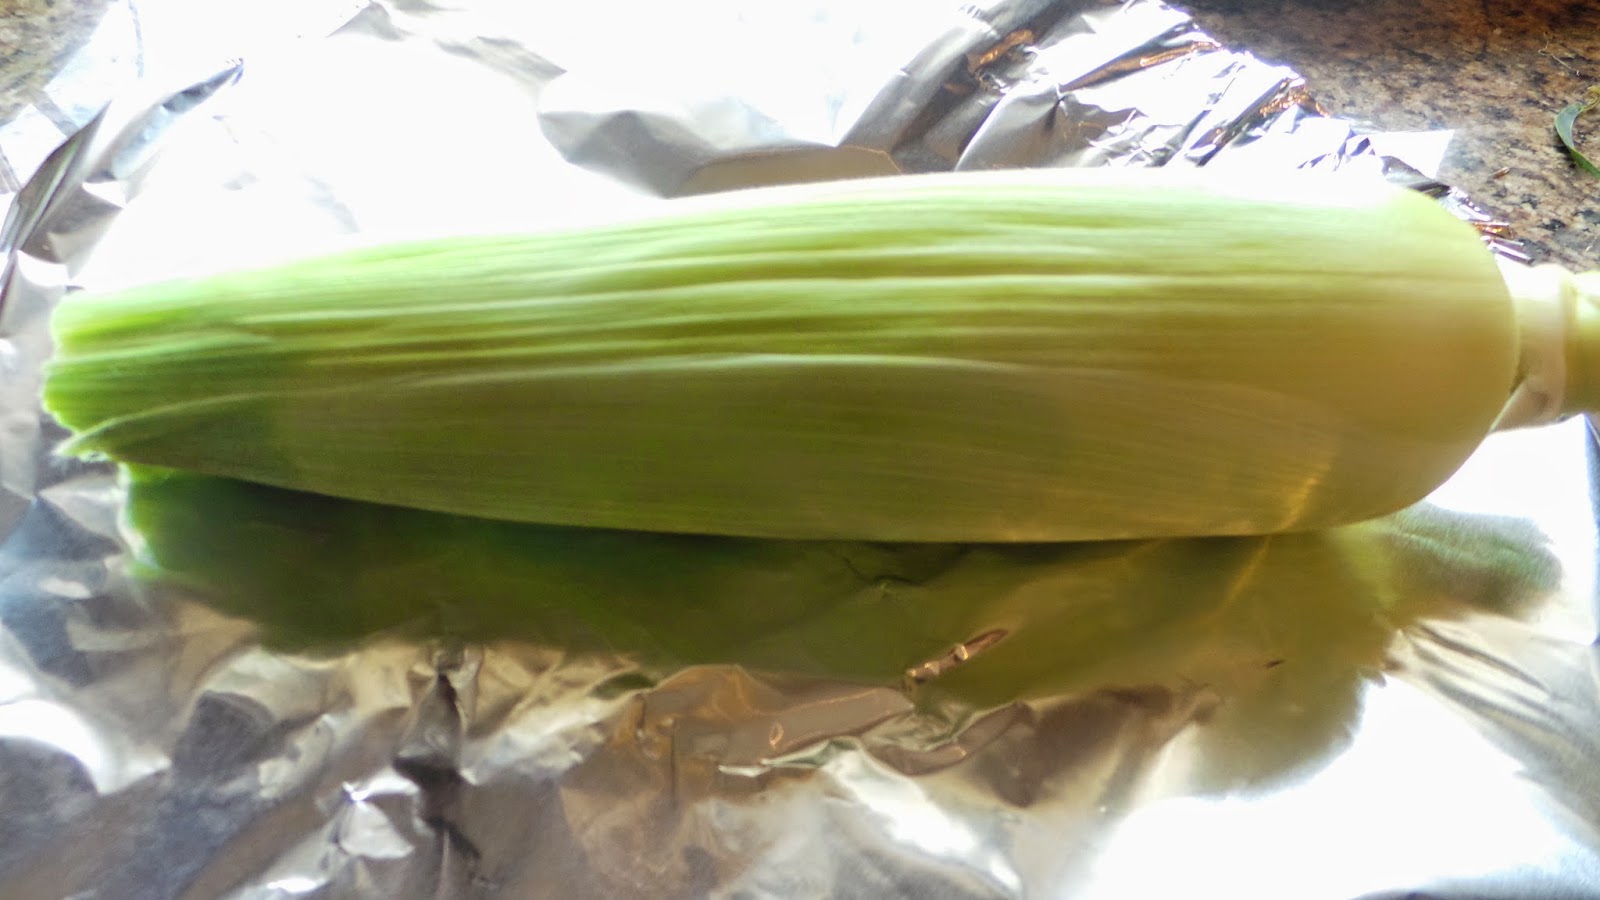
Place on a piece of tin foil, big enough to completely cover the entire cob of corn.

Wrap the individual ears of corn in the tin foil.  Freeze, and enjoy later.


A bonus of doing this - if you are someone who likes to roast their corn in the leaves, all you have to do is pop it in the oven, or BBQ or firepit, without any other prep.  If you prefer, once you remove from the freezer and thaw (for about 2 hours), then you can just boil in water as usual.

Enjoy!

Time to prep for the "Dingo's Den Burger Throwdown" this evening, where I'm a judge.  Details to follow. 


Wednesday, 6 August 2014

Creamy Mushroom Risotto


It took me a long time to venture into the world of risotto.  I'd heard people talk about it, had it in restaurants, but I'd always heard that it was fussy and hard to make.  When I finally got up the nerve to try it, it's now one of my favouite things to cook and to make.  It pairs perfectly with some BBQ'd chicken, and usually when I start the BBQ, I start the risotto, and they are finished at the same time.  It helps a lot if somebody else is manning the BBQ for you.

The key to a nice creamy risotto is to stir, stir, and stir some more.  You don't have to stir constantly, but you do have to watch it closely.  Once you are experienced at making it, you will be able to "hear" when the liquid is getting low and more needs to be added, and it needs a stir.  Good luck.


Creamy Mushroom Risotto

Ingredients

Recipe by the Fluudblogger
  • 2 tbsp butter
  • 1 tbsp olive oil
  • 2 cups mushrooms finally chopped
  • 1/4 cup finely chopped onions (shallots are good too)
  • 2/3 cup dry white wine
  • 5 cups chicken or vegetable stock
  • 1-3/4 cup arborio rice
  • 1/3 cup freshly grated Parmesan cheese
  • 2 tbsp chopped fresh parsley or chives (optional)
Cooking Directions
  1. Heat oil in saucepan on the stove on high. 
  2. When it starts to smoke, add the butter. Once melted, reduce heat, add the onions, and cook until slightly brown, only a couple of minutes. 
  3. Add the chopped mushrooms, and cook another minute until softened.
  4. Add 1 cup of chicken stock, the white wine, and the arborio rice. Reduce heat to medium low. Stir very often, and when liquid is almost all absorbed, add another cup of stock.
  5. Continue doing this until all the stock is added and the rice is fully cooked. About 30 minutes. 
  6. Other variations, can include no mushrooms, but adding finally chopped asparagus.  Instead of white wine, you can use vermouth or even brandy. If you don't want to add any alcohol, then just add more chicken stock.           


Tuesday, 5 August 2014

White Sangria (Boozy version)

One of my favourite things about summer is sitting outside and drinking a nice refreshing glass of sangria.  There are many different versions, but this one is always a favourite.

1 litre (4 cups) of cheap white wine
4 ounces orange liqueur (Triple Sec)
4 ounces coconut rum
4 ounce Peach Schnapps (if you omit the schnapps, just double the coconut rum)
1/2 orange
1/2 lemon
1/2 lime
1 tbsp each of lime juice and lemon juice
1/4 cup fresh or frozen blueberries or raspberries or both
16 ounces Sprite or 7 up (regular or diet)
Sugar or Blue Agave syrup to taste.

Combine all ingredients except soda and let sit for at least an hour in the fridge.  When ready to serve, add ice, and soda.

To make a non-alcoholic version make the following subsitutions:

For white wine - use white grape juice
For orange liqueur use orange juice
For Peach Schnapps use peach juice
Omit the coconut rum.