09 10

Wednesday, 30 July 2014

Banana Nut Muffins


What do you do with left over, over-ripe bananas other than banana bread?

I like a good banana bread as much as the next person, however sometimes it's not convenient to have to slice into the loaf if you want a quick snack or pick me up.  

So recently when I had a couple of too ripe bananas I decided to make banana walnut muffins.


Banana Nut Muffins

Recipe by Fluudbloggler

Ingredients
  • 1/4 cup Soft butter
  • 1/2 cup sugar
  • 1 egg
  • 2 or 3 ripe bananas
  • 1/2 tsp vanilla
  • 1 cup flour
  • 3/4 tsp baking toda
  • 1/4 tsp salt
  • 1/8 tsp baking powder
  • 1/8 tsp cinnamon
  • 1/4 cup chopped walnuts
Cooking Directions
  1. In a mixing bowl combine butter, sugar, and egg until creamy. 
  2.  Add banana and mix well. 
  3.  Slowly add remaining ingredients.

  4. Fill muffin tins lined with paper 2/3 full.


  5. Bake at 350 for 25 minutes. Check after 20 minutes.
For an extra special treat, substitute the walnuts for chocolate chips.  I would advise eliminating the cinnamon if you do this. 

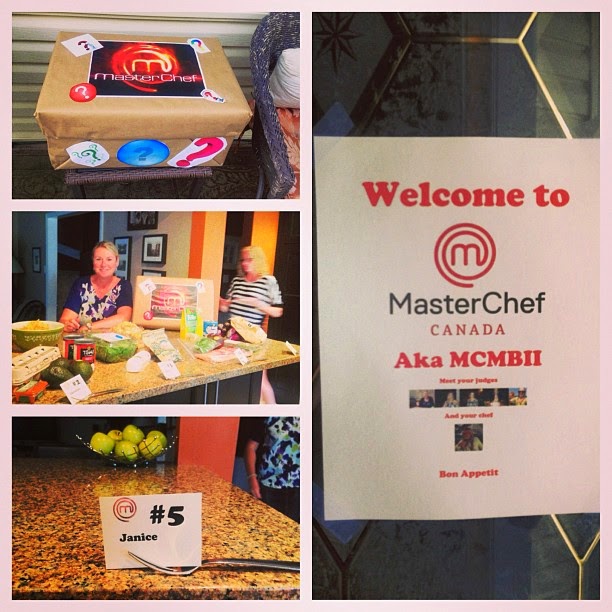
Get Your Masterchef-ish on


I love the show Masterchef.  Canadian and American versions.  I considered auditioning for the show, was even invited by the Canadian producers to do so.  However, I have my own business and taking 40 days off was not something I could do.  Plus, it would be embarrassing if the Fluudbloggler got kicked off on the first show.

So I have to content myself with playing Masterchef with my friends.  We've done different variations on the theme, but basically what happens is my friends bring food, that I don't know about beforehand (aka a "mystery box"), and I have 60 minutes to put a delish dinner on the table.  While my friends watch and drink wine.  Some may think this is not fair, and if you want to plan these types of parties yourselves, maybe considering taking turns would work for you.  Most of my friends like to eat, but don't necessarily like to cook.  I like to do both so it works for us.

So if you are ready for a different kind of dinner party, check out the instructions below.  Our apologies to the real Masterchef judges, producers, and logo creators.

How to host a Masterchef-ish night for your friends:

  1. Invite at least 3 other people, but no more than 7 because that gets too complicated and hard to cook for in an hour.
  2. Decide on food categories that you would like them to bring.  We usually stick to the following: - minor protein; spice; cooking liquid; starch or side; fruits and/or veggies; spice; misc.
  3. Decide who is going to bring which category - but keep your picks secret.  
  4. All guests together chip in for the main meat, and all decide together what that meat is. (Or designate one person to only bring the main meat.)
  5. The rest is up to you to develop the rules.  We have also varied these.  Some of those ideas are listed below.
  6. All guests are given a specific time to arrive, but one person is in charge of placing all the items in the mystery box (we found it was easier to have one box, and not several).
  7. Give the "chef" 10 minutes to look at the box items, and decide what they are cooking.  Then they have 60 minutes to cook dinner.  If the 60 minutes isn't attained, you can decide what the penalty will be.
  8. Enjoy!
Here are some rules we have used, but you can make up your own.  After 4 of these nights, we have changed some things up.

  • allow the chef to use only a certain number of items from their own pantry.  I usually get 4, and those picks are olive oil, garlic, chicken stock, and salt & pepper (counts as one item).
  • if you like drinking, give the chef the option to take a shot for each additional ingredient from their own pantry.
  • if there are 5 guests, the chef has to use at least 3 of the ingredients from each guest
  • if you have only 3 guests, the chef has to use ALL the ingredients brought.
  • decide if the misc. item is a "normal" entree ingredient, or if it's going to be a "weird" item.  I was given animal crackers once, and prickly pear.
  • since this is like Masterchef, don't allow the chef to look up any recipes once the game starts
  • be prepared for a disaster.  If the chef can't pull it off, have a local pizza delivery on call.
This is what my friend Laura brought to our first Masterchef night.


This is what my friend Juliette brought to our first Masterchef night.


If you want to see more.  Check out my Facebook page and see the video created by my friend Christine.

What would you make with these ingredients?

Last night I was given a reprieve.  Most of our regular Masterchef party group wasn't available, but another friend and her father were in town from Calgary.  So we held an impromptu night.  Our young friend Emily took on the challenge of cooking for us.  It was hard to stay out of the kitchen.  Here's what we gave her.


Here's what she made.  It was very yummy.  Thanks Em!


Pork tenderloin coated with basil and garlic (pantry item) cooked in a sauce made with Red Bull, white figs, and Werther's Caramel Apple candies - I think some of her white wine got spilled into that as well.  Mashed potatoes with avacado and cream, and fava beans with cream and pepperoni.  

Monday, 21 July 2014

Scones English Style


I am a patriotic Canadian, am proud to say I'm Canadian to the world, however, I was actually born in England.  I only lived there for 3 1/2 years out of my life, so most of my cooking influences are Canadian through and through.  I did decide several years ago though, to try to make English Scones.

They quickly became popular with friends and relatives and I had many requests for them.  Two different people asked me for them as their birthday present.  Along with the birthday present, I made a book for them called "Make a girl a scone, she eats scones for a day, teach a girl to make a scone, she can make scones for life".  Long title I know, but you get the idea.  So I've decided to share my scones recipe so you too can make them for life if you like.

FYI the correct ENGLISH pronunciation is Sconns, not Scones with a long O (even though it's spelled that way - hey I never said English made any sense).

These are great for morning breakfast, snacks, and even dessert.  The recipe can be easily adapted to add raisins, dried cranberries, blueberries. I often will make 6 plain and 6 with fruit. They can be served plain, or with butter, jam, or if you want authentic English, clotted cream.  Enjoy!

Scones for Life

  • 2 cups flour
  • 3 tsp baking powder
  • 1/2 cup white sugar
  • 1/2 tsp salt
  • 1/2 cup cold butter
  • 2/3 cup cold milk
  • 1 egg
  • 1 tbsp. additional white sugar
  • 1/4 - 1/2 cup dried fruit.
Combine flour, baking powder, 1/2 cup white sugar, salt.

Cut butter into small pieces with a knife and mix in with pastry knife or stand mixer until crumbly.


Divide dough into two.  For 6 plain and 6 fruit scones, add 1/4 cup fruit to one, if making all with fruit, add 1/4 cup each.


Form into equal balls, place on baking sheet, and press down slightly.


Score each ball into 6 triangles, and sprinkle additional sugar on top.


Separate triangles from each other but still keep them close together. (Make sure you don't skip this step.  If you don't separate them, the middle tends to not cook properly, if you totally separate them, they will not be as soft.


Bake at 400 for 20 minutes.  Best served warm, about 10 minutes out of the oven. 


* You can also add white chocolate chips or dried apricots.  I wouldn't dry a wetter fruit like raspberries or strawberries though. 

Wednesday, 16 July 2014

Everybody's favourite potato salad


Everybody's Favourite Potato Salad

Recipe by Fluudbloggler

Summer just wouldn't be summer without potato salad.  However, I know a lot of people who don't actually like potato salad.  Probably because so many people tend to go overboard and put too much "stuff" in their salad.  

A friend of mine hates onions, will not eat onions, and she's one of those people who never ate potato salad because most people put onions in.  I like onions, but when having potato salad, I don't want to only taste onions.  So I developed this recipe.  It's simple, it's easy - and for every BBQ I get requests to make it.  And my onion hating friend, now loves potato salad. Enjoy!


Ingredients
  • 8 Medium white or red potatoes cut into small cubes
  • 3 Eggs
  • 1/4 cup Cheddar Cheese cubed
  • 2/3 cup mayonaisse
  • 3 tsp dried dill weed
  • 2 tbs; bacon bit (optional)
Cooking Directions
  1. Instead of medium potatoes, you can use mini potatoes & cut them into quarters. Using a combination of both red & white potatoes makes for a prettier salad. Do not use Yukon Gold. They are great potatoes, but tend to get too mushy in potato salad. I always leave the skin on my potatoes, but you can chose to peel if you wish.
  2. Cook potatoes in boiling salted water for about 20 minutes. 
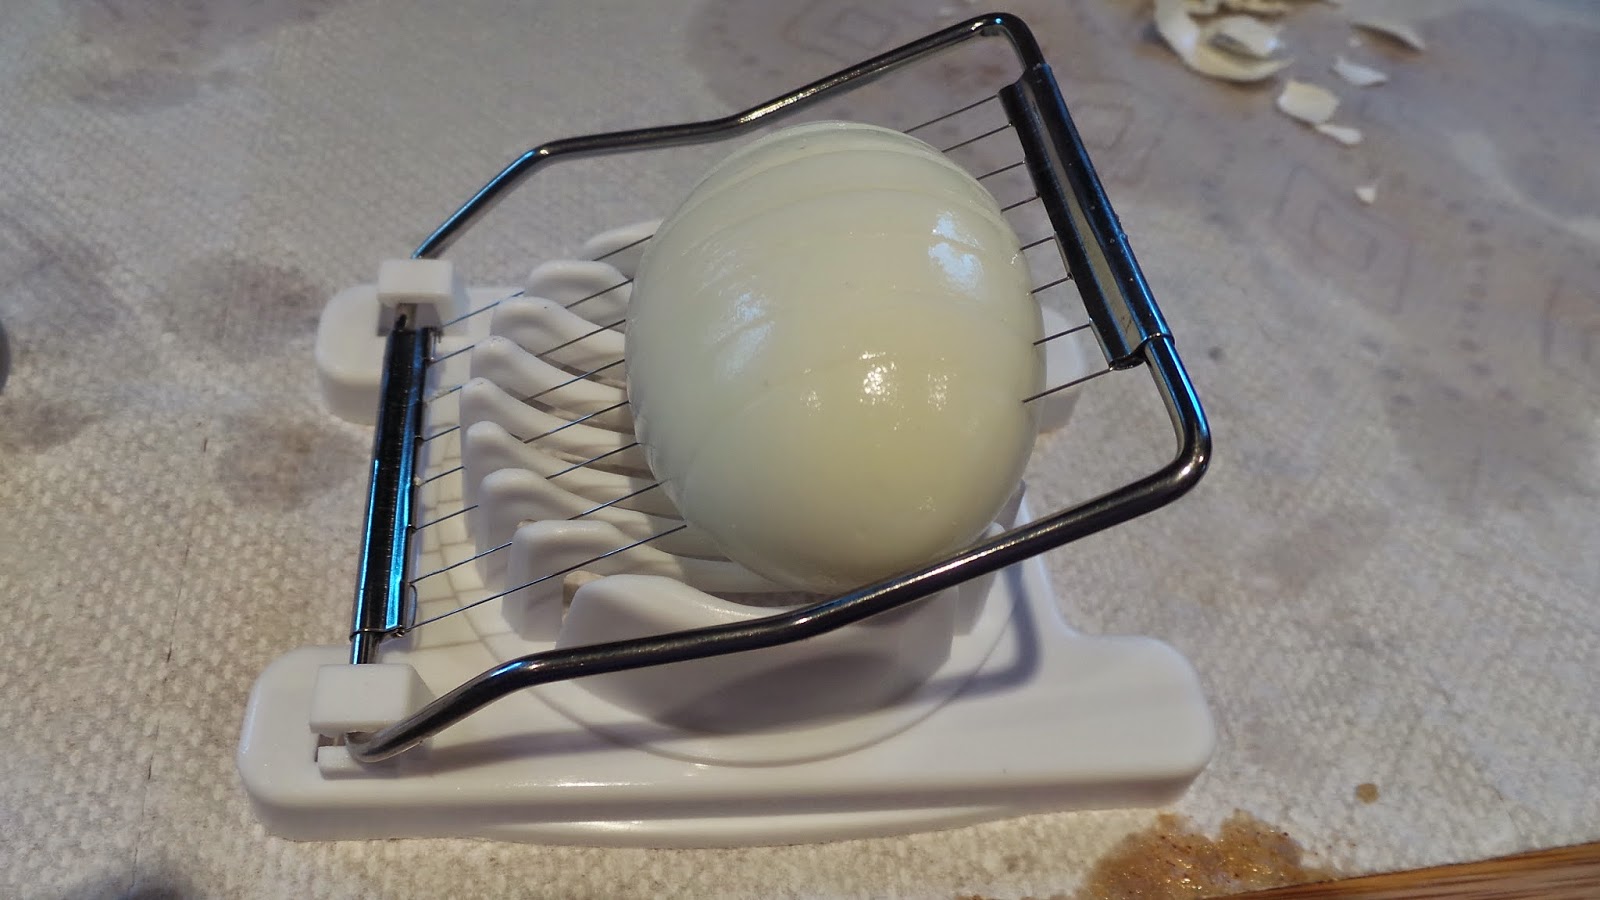
  3.  While cooking potatoes, hard boil the eggs. Once eggs are ready, put in cold water to cool. Once cool enough to the touch, peel, and slice, and put in bowl.
  4. When potatoes are thoroughly cooked, drain and run cold water over them. This releases some of the starch, and helps them to cool down.
  5. Once potatoes are cool, combine all ingredients together in a large bowl. And you're ready to serve.

Tuesday, 15 July 2014

I'm Scared of Creme Brulee, Creme Brulee


I've loved Creme Brulee for years.  There are flavoured ones that I've tried, and while good, I still love the basic Creme Brulee.  However, I was terrified to try to make it.  One day I just decided I would try, and it was easy.  Time consuming a little bit, but mostly easy.  So for anybody out there who is scared to try to make it, here's the no fail version that I use.

I'm Scared of Creme Brulee, Creme Brulee


Easy Creme Brulee

Recipe by Fluudbloggler

Ingredients
  • 6 eggs yolks
  • 8 tbsp. white sugar, divided
  • 1/2 tsp vanilla extract
  • 2 cups whipping cream
Cooking Directions
  1. Preheat oven to 300 degrees F (150 C)
  2. Prepare ramekins by placing in a large baking dish dish, with about 1/2 inch of water in the bottom.
  3. Beat egg yolks, 4 tbsp. sugar & vanilla in a mixing bowl until thick and creamy.
  4. Pour cream into medium saucepan and stir over medium heat until it almost comes to a boil. You see steam coming off it, but it's not bubbling. Remove cream from the heat and stir into egg yolk mixture; beat until combined.
  5. Pour cream mixture into the top of a double boiler. If you do not own a double boiler, use a big pan with water boiling in the bottom, and a heavy metal bowl on top of it.
  6. Stir over simmering water, almost constantly until mixture starts to thicken. The term is often used "until it coats the back of a spoon". I usually just consider it ready when it thickens to the point that it resembles really melted ice cream. This takes anywhere from 5 to 7 minutes.
  7. Remove from heat and carefully pour in to 6 ramekins.
  8. Bake in oven for 30 minutes. Remove from baking dish water bath, and let cool to room temperature. They should still jiggle a little when moved. Then refrigerate until set at least an hour.
  9. Take remaining white sugar and sprinkle over the tops of the creme brulee. I've seen recipes that call for brown sugar or a combination of both, but the brown sugar tends to burn too quickly, and you get a much better, crackly top, using just white sugar.
  10. If you have a cooks torch, use it to fire over the top of the creme brulee until you can no longer see white sugar granules. If you don't have a torch, then place under broiler until you get the same result. You will have to watch closely so that you don't burn the sugar.
  11. Refrigerate again until you are ready to serve. Will keep nicely in the fridge for a couple of days.
Your creme brulee is perfect when the top cracks when you hit it with a spoon like this:

Favourite Desserts

I posed a question on Twitter yesterday, if you could only  have one dessert for the rest of your life, what would it be.

Mine was Princess Cruises, Princess Love Boat Dream pictured below.


Some of the other posts were:

Raspberry Creme Brulee
Grand Magnier Ice Cream (Was this supposed to be Grand Marnier?)
Classic Creme Brulee
Fruit and Vanilla protein salad
Tiramisu
Strawberry Rhubarb Pie

Princess Cruises graciously game me the recipe for the love boat dream when I asked so here it is:

Princess Love Boat Dream (serves 8)

1 pound bittersweet chocolate
8 ounces sweet butter
6 large egg yolks (slightly beaten)
8 egg whites
3 ounces Lady Godiva Chocolate liqueur
1/2 cup superfine sugar
3 tablespoons vanilla-flavoured sugar*

Garnish:

16 fresh mint leaves
1 ounce white chocolate
1 ounce milk chocolate
2 tablespoons strawberry piping gel (optional)
2 tablespoons bittersweet chocolate

Melt the chocolate in a double boiler, or VERY carefully and SLOWLY in a microwave, stopping to stir often.  Remove from heat and add the butter.  When the mixture is very smooth, add about half to the egg yolks quickly blending. Once well incorporated, pour egg mixture back into the chocolate, and then add the chocolate liqueur and mix until smooth.  (This is the same method used in my lemon meringue pie recipe.)

Whisk the egg whites until very stiff, just like a meringue, and then add the sugar and flavoured sugar.

Gently fold the egg white mixture into the chocolate mixture.  Pour into a heart shaped or round mold and refrigerate for at least 12 hours to set.

Unmold the chocolate and place in the centre of the plate.  Garnish with white chocolate and milk chocolate shavings.  Pipe strawberry gel around plate or melt some chocolate and pour melted chocolate around the plate.  Dust mousse with cocoa powder and garnish with fresh mint leaves. 

This is obviously something for a special occasion.  There's not a lot of work involved, but the ingredients would be pricey to purchase.  Better yet, just book a cruise! 

*This recipe calls for vanilla flavoured sugar.  You can purchase in high end specialty food stores or make your own.  Either way it's expensive.  I've made this recipe, used the sugar, and adding 1/2 tsp of vanilla.  It doesn't make a significant difference to the taste.


Monday, 14 July 2014

Wine. What is it good for? Absolutely EVERYTHING.


I love wine.  I like the taste, I like the colour, I like the scent (or bouquet if you are really that crazy about wine).  I like the glasses, I like the culture.  I like pictures of wine, I love wine glasses, I love travelling to wineries.  So far I've only been to the Ontario wine regions and Napa & Sonoma valleys in Northern California. 

On the weekend, I ended up at 3 wineries doing a lot of tasting and little buying.  

Our first stop was Trius. We've been to this Ontario winery many times. It was formerly called Hillebrand, and I think is officially Trius, by Hillebrand.  And is owned by the Andrew Peller company.  The same company also offers, Peller, 30 Bench, French Cross and the Gretzky wine.  Same company, but all with different wine makers so all very different wines.  

 If you are fortunate to go with a wine club member, you can enjoy less crowds in the private tasting room.  And if you are REALLY lucky, Kim will be the one helping you with your tastings.  She is very knowledgeable and really fun.  

We started off with some Brut (Canadian Champagne), tried a Reisling (which is a white that is on the sweeter side, great for sipping), and progressed to other whites and reds and ended up with ice wine.  If you are tasting for the first time, or want to host a wine tasting party, always start with sparkling, light whites, and progress to the heavier reds.  If you go backwards, or jump around, you will not enjoy the experience as much, and the flavours won't taste right. 

I was with our friends who were getting engaged later that day (unbeknownst to the future bride, but with full knowledge of the rest in the group), and so we were also interested in possible wedding venues.  Trius used to offer this service but do not any more.  

I purchased a wine called "Showcase Red Shale, Cabernet Franc 2011" after tasting, and enjoying.  A Hillebrand label.  Very full bodied, but not too heavy.  I would for sure eat with a steak, but would also be good with pork.  Wouldn't really drink with poultry.  It is very smooth, and to be honest, also good for just sipping.  Some wines need to be taken with food to improve the taste, but this is enjoyable on it's own.


Next stop was Stratus.  This is a very sleek looking modern winery.  And for those of you interested, they do offer weddings.  But we were told that if you aren't having the reception outside on their beautiful patio, it is inside where all the big vats are, so unless you want rustic, I would advise against it.  If anyone knows that I'm incorrect (since we didn't ask the actual event planner, just the people working the tasting bar), please let me know.

I LOVE ice wine and late harvest wine.  My husband is not a fan.  However Stratus offered a sweet dessert wine called Mosaic, which was only a 4 on the sugar scale.  Some ice wines can be as high as 17, so while sweet, it's not crazy sweet.  It is a white dessert white, so would pair really well with my lemon meringue pie.  Or better yet, Creme Brulee - easy recipe to follow later this week.


Next was Peller Estates.  This is a large facility for tasting and offers lunch and dinner.  Excellent, excellent restaurant.  A little pricey for a lot of people, but well worth it if you can afford it.  I went last Fall when they were offering a fixed price menu which makes it a little more affordable.  Beautiful buildings and surroundings with lots and lots of parking.  The tasting room is often very busy and this weekend was no exception.

Here I bought the 2012 Peller Estates Meritage.  To be perfectly honest, I didn't taste this one.  My husband, had been reading up about it, and the reviews were very good, so purchased a bottle.


The picture at the top of this blog is a Peller Estates Cab Franc Ice wine.  It is to die for.  Having this with chocolate or something like a rich pecan pie would be amazing.  However, it's $90 for a 375 ml bottle, so better go somewhere to taste first. 

I should have made better notes during this wine tasting experience so I could be better at sharing with my blog readers, but was too involved in the actual tasting, and getting distracted by the impending engagement.  Will promise to do better next time.

Cheers!


Saturday, 12 July 2014

Ontario Wineries

Fluudbloggler is off to Niagara-on-the-Lake today to sample some wine at some great Niagara Wineries.

Future blog....wine pairings for beginners.  .

And for those who have never thought it made any different what you eat with your wine try this:

Take a sip of a cheap white wine.  Then take a bite of parmesan cheese.  Then take another sip.  The wine suddenly takes on a whole different taste - and actually (usually) tastes a lot better.


Friday, 11 July 2014

Revised measurements for mac & cheese

Sorry guys, I realized that I had posted the 1/2 size of the mac & cheese recipe.  Something I had been experimenting with.

I've now updated the correct measurements.

Rice Cooker Madness


The humble rice cooker.  Guess what?  It's not just for rice.

Of course, if you have one, you know how much easier it is to make rice using one.  If you don't have one, and you like rice, they are cheap go and buy one today!  If you don't have one, and aren't particularly FOND of rice, you still need one if you like any of the food choices listed below. I bought a Black & Decker model at Canadian Tire.

So.....you may ask.  What can I do with my rice cooker?

Rice (obviously)

The cooker will come with instructions on how to cook various types of rice.  I basically just do exactly what I would do if I was cooking rice on the stove top. Put in the rice, salt, butter and water, hit the cook button, and when it's ready, it will switch itself to warm mode and you're done.

Steamed vegetables

Mine came equipped with a little plastic basket.  Put water in the bottom of the cooker, put the plastic piece in, place veggies in basket, and steam away.


Quinoa

Yep, quinoa.  I'm not a big fan of quinoa, my apologies to those of you who love it.  However, the first couple of times I made it, I used my rice cooker.  Below is one recipe that I tried. And considering I'm not a fan, I enjoyed it.

Macaroni and Cheese

This is actually my favourite thing to make in my rice cooker.  The recipe below, is the yummiest mac & cheese I've ever eaten, and so easy to do.  Sorry I don't have a picture of this right now.

Risotto

You can make risotto in your rice cooker.  You still have to pay attention, and add the liquid as you go, and occasionally stir, but you don't have to watch it as MUCH as you normally do cooking on the stove top.


Rice Cooker Eggplant Quinoa

1 cup quinoa
1 cup coconut milk
3/4 cup chicken stock (or vegetable stock)
1/4 cup white wine (optional - if you choose not to add wine, use 1 cup chicken stock
1/2 cup chopped eggplant

Place all ingredients in slow cooker, stirring once, until done.

Best Ever Rice Cooker Mac & Cheese

1 cup macaroni noodles (or any other small noodle) uncooked
1/2 cup chicken stock or water
1/42cup heavy cream or 1/2 and 1/2 cream
3/4 cup shredded mixed cheeses - cheddar, mozzarella, parm, goat cheese - whatever you like
1  tbsp butter
1/4 tsp salt & pepper
1/2 pinch of cayenne pepper - 1/2 pinch is NOT much, so don't overdo it.

Place noodles and liquids into rice cooker and set to cook.
When cooker switches to keep warm mode (about 15 minutes), add the other ingredients until well blended and serve.

If anybody reading this blog has tried other things in their rice cookers, please comment to me, I'd love to try your ideas as well.


Thursday, 10 July 2014

A little Asian inspiration for your BBQ`d steak dinner.

The best steak I ever had was BBQ`d by a former butcher friend.  He knew just what to do with this steak to make it melt in your mouth.  He used a prime rib roast and cut it into steaks.  (We were at a vacation condo at the time, and there were no proper knives so he used a tiny little knife.)  I tried to use a similar technique tonight with our dinner.

I decided to make the steaks and the remainder of tonight`s dinner with a little Asian influence.  I created my own teriyaki marinade.  For sides I made a coconut rice, and a salad with a honey ginger dressing.


So this is the steak that I started with.  It was cut from a roast - my knife skills are not that of my friend`s and I`m pretty sure THIS isn`t prime rib, but you get the idea. Any good BBQing steak will work.

I made a quick and easy (thin) teriyaki type marinade, and marinaded the steaks for about 30 minutes.

Teriyaki Marinade

1/2 cup soy sauce
1/3 cup brown sugar
1/2 tsp minced garlic*
1/4 tsp minced ginger*
pinch of salt
pinch of pepper

Mix together until sugar is dissolved, place steaks in bowl, pour marinade over steak and let sit.


After the 30 minutes, BBQ as you would any normal steak - I like medium rare so only 4 minutes per side.  Flip only once.  (My husband, for some reason has an issue with this.  He's a flipper, hates, to only be able to flip once.  Plus every time he BBQ's steak, he has to ask me how long.  I gave him the steak yesterday, and just waited until the inevitable question - and it came.  FOUR MINUTES A SIDE.)

While the BBQ was heating up I made my coconut rice.  I used a rice cooker (about $10 at Canadian Tire) so I can just leave it and can do other things.  To make coconut rice, all I do is make white rice and substitute half the water for the same amount of coconut milk.  If you like a sweet coconut rice, use ALL coconut milk instead of water.

I've never been known for my plating skills.  This is about as complicated as I get.  When making coconut rice, after it's cooked, I put in small ramekins.


And then turn upside down onto the plate.  I sometimes will add just a little blob of toasted coconut on top.


Everybody can make a salad.  They can often be boring or ho hum.  I tend to make the same kind of lettuce salad a lot.  Sometimes I make the vegetables look different just for fun.  In this case I julienned the red pepper (small thin strips), and slivered the carrots - I used a potato peeler and just shaved the carrot. 


To continue with my "Asian inspiration". I made a dressing with ginger and honey in it.  

Honey Ginger Dressing

1/2 cup olive oil
1 tsp balsamic vinegar
2 tbps.honey
1 tbsp dijon mustard
1/4 tsp garlic
1/4 tsp ginger
1 tbsp mayonnaise

In a squirt bottle or small class jar, add all ingredients and shake until smooth.  It's a bit runny, so treat it like a vinegar type dressing.  To make it creamier if you prefer, just add more mayo.


To add a bit more depth to your salad, consider adding different foods not necessarily just vegetables.  This one has dried cranberries, sunflower seeds, and cheddar cheese.  (Along with lettuce, carrots, red peppers, cherry tomatoes, celery and mushrooms.)

*minced garlic/minced ginger - I like to use fresh when I have it and when I have the time, but you can buy jars of both made by Derlea Foods - they are a great time saver.

Tomorrow's blog.......Rice Cookers - not just for rice!


Wednesday, 9 July 2014

Chicken Pot Pie in the summer?


Why would anybody be blogging about chicken pot pie in the middle of July? Doesn't everybody just BBQ all the time?  I think it's a good idea myself.  So I say "yes chicken pot pie in July".  And here are some of the reasons why you might want to make one or two even in the summer.

1) It is raining, and you don't want to BBQ in the rain.
2) You are sick of BBQ-ing, and want something different.
3) You had a big BBQ on the weekend, and you have leftover meat you don't know what to do with.
4) BBQ-ing means nothing to you and you just feel like some comfort food.

Those are some reasons anyway.  Another one, is that when I made my lemon meringue pie yesterday, I doubled the crust recipe and so had extra pie crust lying around.

So here's a recipe for leftover-ish chicken pot pie.  It can be changed to beef, or actually using non-leftover ingredients.

LEFTOVER-ISH CHICKEN POT PIE

(enough for two small pot pies)

1 single pie crust
1 cooked chicken breast cut into cubes (can use left over or cook from fresh, any BBQ sauce used to cook the original chicken just adds flavour)
2 small white potatoes, cook and cut into cubes (maybe if you are making potato salad for a BBQ, just cook extra and keep in the freezer until ready to use)
1/4 cup frozen corn
1/4 cup frozen peas
1/4 cup carrots (cooked) and cut into small pieces
1/4 onion finely chopped (I usually quick fry the onion before adding to rest of ingredients)
2 tbsp. olive oil
1 cup chicken stock 
salt & pepper to taste
1/2 tsp curry powder (optional)
1/4 tsp garlic powder or 1/2 tsp fresh minced garlic
2 tbsp flour

In a small saucepan, put chicken stock, olive oil and flour.  Cook over medium-high heat until boiling and starting to thicken.  This is your gravy.  If too thick add water, if too thin, quickly mix some water and more flour together and whisk and blend in.  Do not just put extra flour in without the water or you will get lumps. 

In a large bowl toss chicken, vegetables, spices, and gravy until well-coated with gravy and well mixed.

Roll out the dough and line two large pot pie bowls with the dough.  It's a bit tricky, so if your dough seems a bit dry, add a tbsp butter before you roll or try to put in bowls.  Divide the ingredients into each of the two bowls. If you have too much filling, it can easily be placed in a freezer bag and frozen to use at another time.


 Roll out the remaining dough to cover the tops of the pies. If you are a little creative, decorate the tops for fun.  The one pictured here was very simple.


Some people choose to brush the tops with an egg wash (egg and water) at this point, but I don't.  There is egg in my crust already, so it browns up nicely.

Bake in a 375 degree oven for 45 minutes.  Make sure you put bowls on a cookie sheet as sometimes when the filling starts to heat up and boil it will spill in your oven.